I'm too excited to share with you a project that I think turned out way beyond adorable.
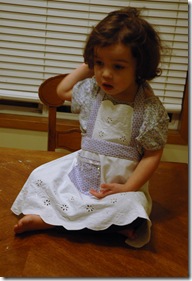
I'm going to show you how to make some cute Mommy and Me aprons from a round tablecloth.

I thought I'd channel my inner Maria and instead of using Captain Von Trapp's curtains I thought I'd use this darling scalloped edged cotton tablecloth I found at the thrift store for $4.99.
Beware this tutorial has a lot of pictures, and my sewing language may be a bit off, which is why I'm using so many pictures.
First I marked the center of the tablecloth with a couple of straight pins. I found the center by folding it in half twice.

The diameter of the tablecloth was 66 inches. If it had been smaller I probably wouldn't have been able to do all four aprons.
Here's the tricky part. It required me doing a lot of measuring of my girls with the measuring tape. And with the measuring came deciding just how long to make them.
For my 10 year old (size 12) I cut the larger lower apron piece around 19 inches long. I cut all the pieces using the center marked in the table cloth as my guide. I had a large quilting ruler that helped mark the straight edges but you could use the edge of a poster board as well. To figure out how wide to make the piece I measure each of my girls waists and then reduced that measurement by half. For example if a waist measured 24 inches then I made the measured the width of the apron's lower piece 12 inches long. In actuality it cut a bit longer because I cut making sure the top edge was always 19 inches from the lower edge. Here is an example.

Here is a breakdown of all the measurements I made.
For the Lower Apron Piece
Child size 12
Length 19 inches - Width 15 inches
Child size 10-12
Length 18 inches - Width 15 inches
Child size 4-5
Length 15 inches - Width 12 inches
Adult size medium
Length 23 inches - Width 20 inches (no I don't have a 40 inch waist I just wanted my skirt part bigger)
For the upper Apron Piece (same cutting rules in relation to center applied)
Child size 12
Length 7 1/2 inches - Width 7 inches
Child size 10-12 (same as size 12)
Child size 4-5
Length 5 1/2 inches - Width 5 1/2 inches
Adult medium
Length 10 1/2 inches - Width 8 1/4 inches
When making the cuts I tried to center the scallop designs especially on the upper apron cut.
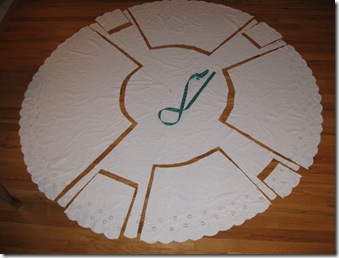
There was enough material left in the center for the adult waist sash and neck sash. For the girls aprons I used some of my left-over on-hand material (sheets, bed skirts, Halloween material for colored sashes and pockets in my girls favorite colors. This way they can tell their aprons apart.
For the waist sash I took their waist measurements and doubled the length.
For the two neck ties I went back to original waist length. (If you want a cute crossed back effect then add 5 inches onto the waist measurement. Then I cut out matching pockets leaving 1/2 inch seam allowance around the edge.

Waist Sash Measurements. Here are the measurements I came up with. Cut 1 of material and 1 of lightweight fusible interfacing about 1 inch shorter in length and width. This measurement is just enough to tie a bow. If you want the apron to grow with your child I'd add even more to the length.
Child size 12 & size 10-12
55 inches in length and 4 inches in width.
Child size 4-5
49 1/2 inches in length and 4 inches in width.
Adult medium
75 inches in length and 5 inches in width.
Neck Tie Measurements. Cut 2 each of both material and 1 inch smaller of lightweight fusible interfacing. Remembering to add 4-5 inches if you want to do the criss-cross version shown at the end.
Child size 12 & size 10-12
25 - 30 inches in length and 3 inches width.
Child size 4-5
24 - 29 inches in length and 3 inches width.
Adult Medium (cut 1 not two)
44 inches in length and 4 inches in width.
Pockets. I didn't really measure these out and I rounded the bottom edge. But they were about 7 inches in length and 6 1/2 inches in width except for the child size 4-5 and her pocket was about 5 1/2 inches square.
I also found some cute beaded trim at the dollar store that I used to accent the pockets with.

Fuse interfacing to wrong sides of all sashes.

Next I marked with straight pins just how high the front part would go on the neck straps.

and zig-zagged all unfinished edges of the main apron. Serging it would be fine also.

Next fold neck tie down the middle right sides together. Starting at the straight pin sew around a 1/3rd to 1/2 inch seam around the neck tie piece. Remember to trim the corners before you turn the sash right side out.

I used a drum stick (courtesy of teenage boys in the house) to turn the strap right side out.

Then I pressed the sash flat and pressed down the material of the un-sewn edges as shown.

Carefully line up the upper apron section of material within the fold. Make sure the upper apron is at least a good 1/3 inch within the fold so that when you sew the sash on it will catch all the material.
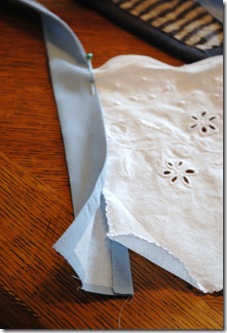
I then sewed about an 1/8th of an inch edge making sure to catch both sides of the sash as well as the apron section.

To make it uniform, I continued this top stitch all the way around the necktie sash.

For the adult apron I chose to make one strap continue on to the other side. I used the same technique of capturing the upper piece between the folded edge of the sash and stitching it together.

After the apron was done I realized that the top portion of the adult apron needed a couple of tucks to make it look a bit better. On mine the darts took in at least 1/2 inch on each side and were 2 inches in length. You'll have to determine how big to make yours.
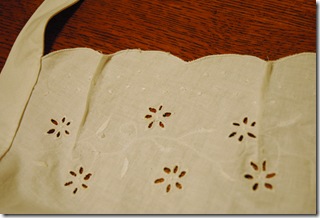
Pockets were next. Sew a zig-zag stitch or serge all edges.
Make a small double fold towards the wrong side of the fabric at the top of your pocket. Then top stitch. Sew on whatever trim or decorations you want. Then carefully fold and press around the rest of the pocket, to the wrong side, about 1/3 to 1/2 seam.
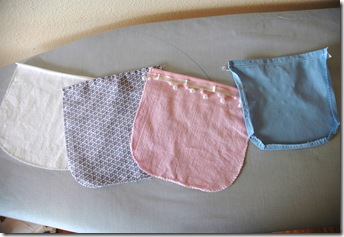
Place the pocket on the skirt area of your apron in a desired location, pin it on then top stitch it down. You will also want to fold or turn in (two times), the raw (side) edges of the apron skirt. Then hem the edge into place.

This next step may sound a little funny but will make sense later on.
Carefully center and then pin the bottom wrong side of your apron top onto the upper wrong side of your apron skirt. WRONG sides together.
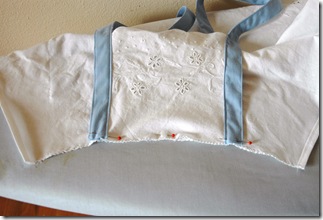
Then sew. Yes the seam will seem backwards on the front of the apron. Press it open and add an extra seam allowance for the rest of the top skirt section.

Baste, with a large stitch, that fold down. Yes I know it looks backwards. It will be o.k.
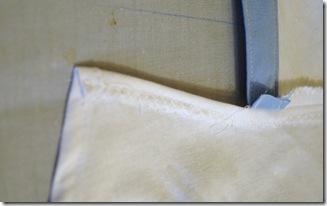
Sew a short and long side of your long waist sash with right sides together. Make sure that you cut tapers in the corners so they don't bunch when you turn them. Use your your drumstick, wooden spoon handle, dowel (whatever you have on hand to turn it right side out. Press.
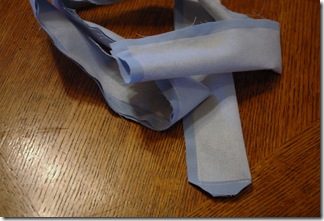
To finish. Tuck the end in on itself and top stitch close.
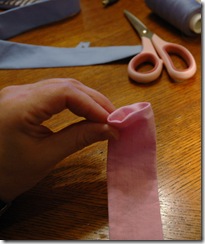
Fold down the seam on the front of your apron. after you've found the centers of the apron and sash pin them together making sure the sash (seam side down) barely overlaps the seam line on your apron.

Like this...
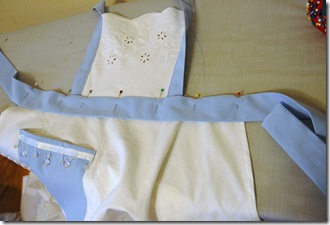
Then add your 1/8 to 1/4 topstitch on the top of your sash connecting the sash to the apron and covering up the seam facing front.
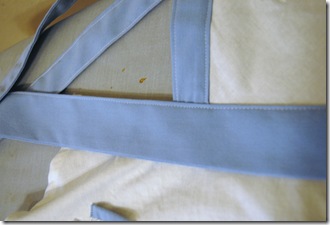
I went ahead and continued the the top stitch all the way along the sash. When sewing the bottom edge of the sash to the apron's skirt for the second time. Go slowly and carefully ease the fabric into place. It's a bit trickier because the apron fabric is getting wider the further down it gets.
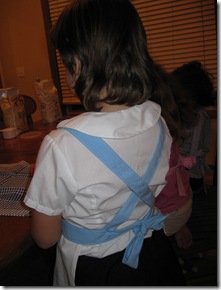
When I finished making the aprons this is where I discovered it would have been nicer if I had made the neck straps a little longer. If you do make them shorter then you can tie the straps behind the neck. If you make them 4-5 inches longer, you can then with buttons and buttonholes, get a cute criss-cross effect on the backside of your apron. I pinned this one in place so you could get the idea.
Put the apron on your child to determine where the best placement of your button holes should go.

Then have fun and take lots of pictures. Cause chances are...

If you put something this cute on your girls...

They are going to want to spend more time in the kitchen with you.

Happy Sewing and Cooking.